Pro Option
How to use your Pro Option with your Joué Play.


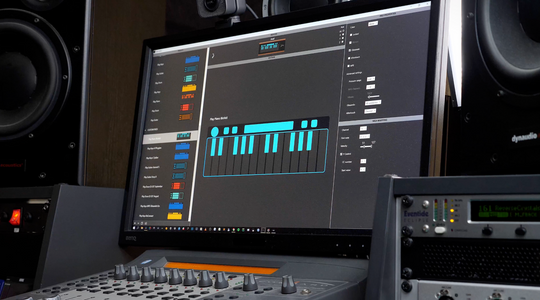
SOFTWARE INCLUDED - FREE ON REQUEST
UNDERSTAND THE JOUÉ EDITOR
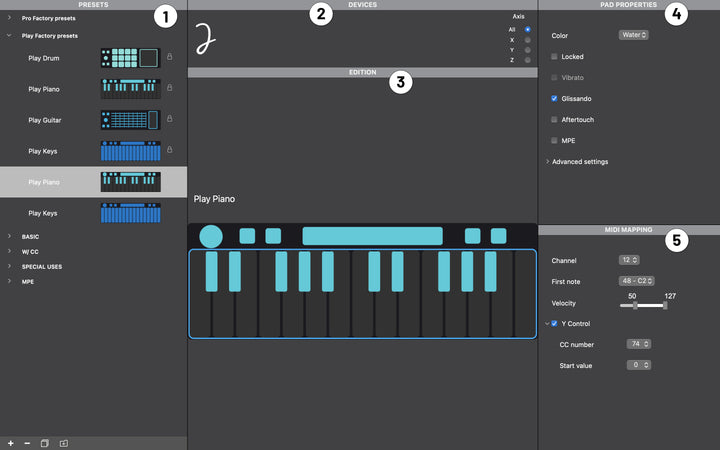
Here you will find the different pad configurations that have been saved. You will have by default the factory settings of the Play Pads with a lock, as they cannot be modified. You can rename your presets, and organize them in folders as you wish.
To create a new preset or folder, simply click on the respective icon at the bottom of the preset column. In order, you can add, delete or duplicate a preset or create a new folder.
This is where you will find your board once plugged in, as well as the pad that is placed on it.
The X, Y and Z axes indicate the movements detected by the board, by checking one of the axes, it will lock it.
This can be very useful if you want to manually assign the X axis without triggering the Y axis for example. In this case you can check only X, assign the movement on your DAW, then return to Joué Editor to check all axes.
By clicking on a preset in the left column, a pad will appear in the center of the program in the "Edit" section.
This is where you can choose the keys of the pad you want to edit.
For example, we can see here that it is the piano notes that are selected, but we can very well click on the bubble at the top left or the ribbon to edit these areas.
In this section you can edit the general properties of the selected pad. This is where you can define the overall response of the pad to the different gestures that you apply to its surface.
Good to know :
- Vibrato / Glissando : allows you to vary the pitch of the sound by vibrating on the same note or by sliding on all the notes.
- Aftertouch / MPE : allows you to activate the continuous sending of MIDI signals.
The MEP is a particular form of aftertouch, cliquez ici to find out more.
On some pads we will find other parameters:
Custom mapping : on the Keys Pad and Guitar Pad, allows you to edit each key on the Keys Pad or each string on the Guitar Pad differently.
Bending : on the Guitar Pad, if activated, allows you to slightly vary the tone of the sound by moving your finger vertically on the string.
Fretless : if activated, sliding on a string to another note does not trigger the notes on which the finger has passed.
You will also find "advanced" settings to control with more precision the configuration of your pad.
It is in this section that we will be able to edit the information that the pads transmit to our virtual instruments and thus adapt the Joué Play to our use. First of all, you have to select a zone of the pad from the "Edit" section to modify its parameters.
It will be possible to modify different parameters depending on the selected area. We will be able to distinguish three categories :
Notes
Effects
Buttons
MIDI configuration
Each pad has an area dedicated to triggering musical notes.
For each of these zones, it will be possible to define the MIDI channel via which the notes are sent, the first note of the pad (which corresponds to the one on the left, at the bottom if applicable) and the velocity response of the pad on a scale from 50 to 127. If you choose a range of 127 to 127 for example, the velocity will be stable at its maximum.
Special cases
For the Keys Pad, it is also possible to choose the tuning of the pad. To do this, simply select a first note (which will be the "root note", the scale reference) and then a scale/mode from those proposed.
The Keys Pad and the Guitar Pad also allow you to manually modify each key or string. To do so, you have to activate the "Custom mapping" from the "Pad properties" section. Then you can choose a note, a channel, and a velocity response for each key or string.
The Keys Pad and the Piano Pad also have a Y-control, which means that you can manipulate an effect or parameter depending on the pitch you press for each note. We will detail the use of the Y-control in the next part.
Each pad has two effect areas, which allow you to control any parameter to which a movement is assigned. There are three categories of effect/parameter controllers: areas, ribbons and bubbles.
The Guitar Pad and Drum Pad each have an effect area to the right of the note area.
On this area we can control parameters on three axes, X (horizontal), Y (vertical) & Z (pressure). It will therefore be possible to assign the management of parameters on each of these axes from your DAW, your synthesizer, or virtual instrument.
The Keys Pad and the Piano Pad has an effect ribbon above the note area.
On this ribbon, there is only one axis, the horizontal X axis. However, unlike the effect area, it will be possible to use the ribbon for pitch bending.
Finally, there is a bubble on each pad that allows you to control parameters on the 3 axes, X, Y and Z.
Each effect management area has one or more axes that can be acted upon. It is therefore possible to configure the function of each of these axes via the Joué Editor.
For each axis it will be possible to edit several parameters, namely:
- MIDI channel
- The Control Change number on which we're operating
- Min and max values
- The direction (is the maximum to the right or left / up or down)
- The mode (only for X and Y axis), you can choose between Absolute and Relative, click here to learn more
- The 14 bits mode
The Y-axis is available for the Keys Pad and the Piano Pad. You will therefore have access to these features on the note zones of these pads. It is also possible to disable these features by unchecking the box in front of the axis name.
Making an axis inactive can be useful, especially on the Piano Pad and Keys Pad keys, where the Y-axis can modulate the sound in an undesired way depending on the CC assigned to it (by default 74).
Each pad also has 4 separate buttons, namely, the octave change arrows, and the transport buttons (play and record).
The octave change buttons “<” and “>” are not modifiable, and have only one function: to change octave. On the Drum Pad, these buttons allow you to move in a sound bank for example.
The play and record buttons can be assigned to various functions:
- Play a note
- Change MIDI channel
- Enable or disable different features (vibrato, glissando, bending, Y-control, fretless...)
- Modulate a CC
- Program change
- Playing with the pitch, the tone (pitchbend)
If you want to keep the playback and recording functions, choose a CC number and assign the transport functions to your pad from your software.
One of the most important principles in using Joué Play with third party software will be the management of "Control Change", also called "CC".
Numbered from 0 to 127, each CC can be assigned to any parameter. There are two ways of doing this: firstly, MIDI assignment, carried out directly via the software, and secondly, as is usually the case when using hardware, the mapping of CCs with their "common" function.
There is a multitude of predefined ones that you can find here, but with a DAW software, nothing is fixed and you can assign any parameter to any CC number.
The values of each parameter are distributed over an interval of 0 (min) to 127 (max), from the Joué Editor, you can establish thanks to the "range", the min and max values transmitted. For the "on/off" parameters, we will define that [0;63] corresponds to "off" and [64;127] to "on".
From your DAW software, you can assign a parameter to a CC number. The handling differs according to the software used, here is a list of explanatory links for the principal software of the market:
- Ableton
- Cubase
- Bitwig
- Reason
Some virtual instruments or VSTs also allow you to make MIDI assignments, usually from the instrument's settings.
Don't forget to activate the "Control Change" function from the Joué Editor, this function, as seen previously, can be activated on an axis (X, Y or Z), on a button or on an effect area.
Be aware that some virtual instruments, usually emulations of analog synthesizers, will have pre-established MIDI assignments. If we leave CC 74 active on the Y-axis of the piano keys, for example, the cutoff of the filter will be impacted by the way we play, and this will not necessarily be desired. To remedy this, you can deactivate the Y-axis from the Joué Editor, or delete the MIDI assignment from the virtual instrument settings.
If you use your Joué Play withe a reConnect cable and a hardware synthesizer, you will not have the possibility to manually assign CC messages. You will therefore have to refer to the user manual of your machine to check which CC number controls which parameter. Generally, instruments follow the MIDI standard and CC numbers have the same functions, listed here.
The reConnect MIDI cable has two outputs, a USB-A output to power the Joué Play and a MIDI output (female) to send MIDI signals. You will need another MIDI cable (male/male) to connect it to an external device, this allows freedom in the length of the cable and the organization of your studio.
MIDI (or Multidimensional) Polyphonic Expression is a revolutionary MIDI protocol that allows messages to be sent via multiple channels, as opposed to just one. This makes it possible to control several instrument parameters simultaneously depending on how you press the notes.
Unlike the Polyphonic Aftertouch, which sends a single MIDI message per note, the MPE allows three messages to be sent simultaneously, vertically, horizontally and with the pressure applied.
The MPE is currently only available on some software, including the Joué Play application. You can find all the DAW and VST compatible MPE on this site.
The MIDI settings will be specific to each software, however, we will generally find the possibility to assign vertical and horizontal movements, and pressure variations to the parameters of our choice.
To activate the MPE from the Joué Editor, simply check the MPE box in the "Pad Properties" section. You can also choose the MIDI channels used from the advanced settings, [1;16], [1;8] and [9;16].
To learn more about the MPE, you can view this video which presents the use of the MPE in Ableton Live 11 with the first Joué Pro model, all explained by our partner Emmanuel Guillard.
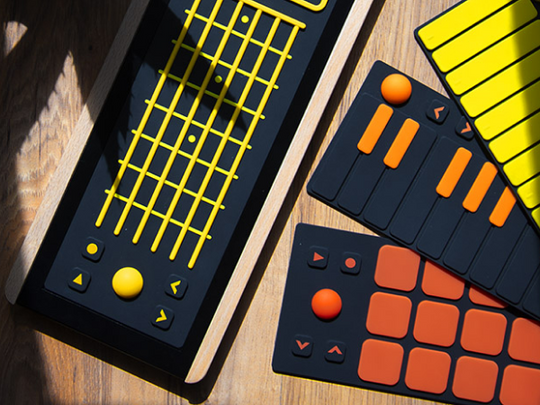
PLAY PADS
The Audio Pad Play
MODES OF PRO USES
Each area where flower is willing to be customized in different modes. Let's add to that the possibility to change the CC number, channel, scale but also the return to zero functionality (when you let go of the finger, the value(s) return to their origins).
Qu'est ce qu'un routeur audio ?
A part of a pie chart acts as a fader according to the radius generating a single CC, this is the simplest mode. The calculation of the radius is done between the center of the petal and the position.

ABOUT
The Pro option allows you to extend the functionality of your Joué Play. As you can see, the possibilities are almost endless. However, some theoretical knowledge of digital music is often required to configure a pad as you imagine it. If you ever have a question, don't hesitate to contact us we are here to help you!